In this article, I will demonstrate you how to import .Jar file in Eclipse IDE Java project.
Step 1: Create Java Project in Eclipse

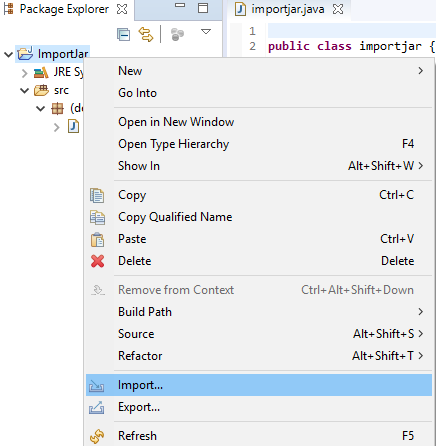
Step 2: Import .Jar file to the project (Right click on the Project)
Import --> File System --> Select the folder where the .Jar file in.

Step 3: Select the .Jar file and click Finish


Step 4: This is the most important step - Add the .Jar file BuildPath
Right click on the .Jar file --> Select Build Path --> Add to Build Path

Step 5: Here you can see now jl1.0.jar file added to Referenced Libraries section.

Step 6: Write the following code to test one of the methods in .Jar file
Here is your output.

Step 1: Create Java Project in Eclipse
Step 2: Import .Jar file to the project (Right click on the Project)
Import --> File System --> Select the folder where the .Jar file in.
Step 3: Select the .Jar file and click Finish
Right click on the .Jar file --> Select Build Path --> Add to Build Path
Step 5: Here you can see now jl1.0.jar file added to Referenced Libraries section.
Step 6: Write the following code to test one of the methods in .Jar file
//Copyrighted geekdecorders.blogspot.com
import javazoom.jl.player.Player;
public class importjar {
 public static void main(String args[])
 {
  System.out.println(Player.class.getName());
 }
}
Here is your output.
Comments
Post a Comment